

The DIY industry is booming, despite the desperate blackmailing of society by finance capitalists. Companies like Adafruit and Makerbot are grossing well over a million dollars a year, and Evil Mad Science Laboratories just recently dedicated themselves to running a full-time kit business. Making kits is fun, but starting a business can be scary. If you already enjoy making gadgets and want to take the plunge into selling your own kits online, this article is for you.
First, have no illusions. You probably won't make much money off of your kits for a while. Accept it. Know it is true. Okay, now that you have your mind right, we can start learning how to design an Arduino shield! You can sell whatever type of kit you want, but Arduino shields are particularly marketable and easy to make.
Step 1 Arduino Shields with Fritzing
Luckily, the open source gods at Fritzing have included an Arduino shield pattern in the Fritzing parts library. If you are new to Fritzing, check out this tutorial for beginners.
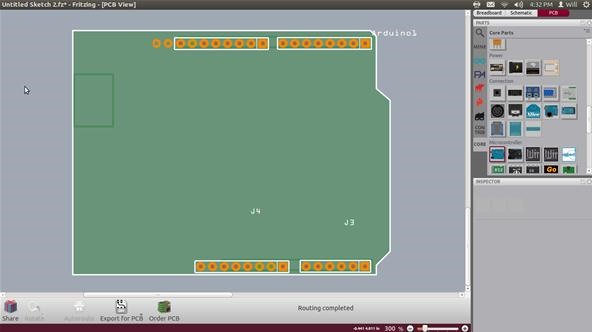
Navigate to the PCB view tab. Click on the green PCB rectangle to select it and bring your mouse to the bottom-right of the screen. Go to the shape scroll-down menu and select Arduino shield instead of rectangle. If you are making prototypes at home with single-sided copper-clad boards, be sure to select "single-sided" from the layers drop-down menu.
There we go... one Arduino Shield ready for components!
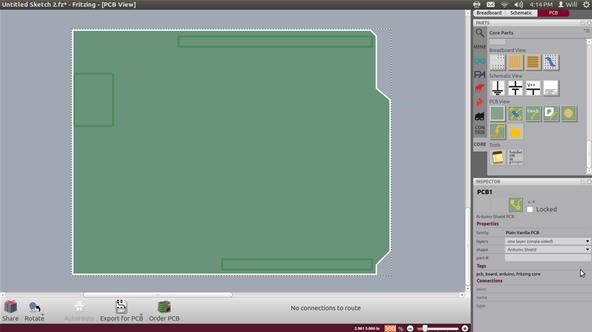
Notice that the shield template even has indicators for header placement.
Now that we have the shape, it is time to add functionality. You can put whatever you want on your Arduino shield, but to be a shield it will have to at least have long lead female headers on the sides. These are the pins that are plugged in when the shield is sandwiched onto the Arduino board.
Select the header component from the "connections" parts menu and drag it onto the work area. Use the customization menu on the bottom-right of the screen to make your component 8 headers long.
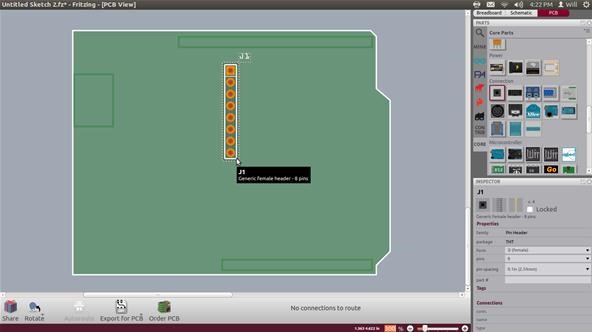
Right-click your headers and rotate them 90 degrees clockwise. Place them in indicator boxes on the bottom and top of the Arduino. Do this until you have a header for each Arduino socket.
A quick way to tell it your headers are lined up is to drag an Arduino board from the components menu and try to line up the component holes. Below, I have dragged an Arduino board directly over my header pins. They all line up except the ones on the lower left.
Perfect! Your Arduino may have more or fewer pins depending on what version you have. The UNO has some extra pins. All shields are compatible with both kinds of Arduino, so don't worry.
Once everything is aligned, remove the Arduino from the work area and start wiring up your parts!
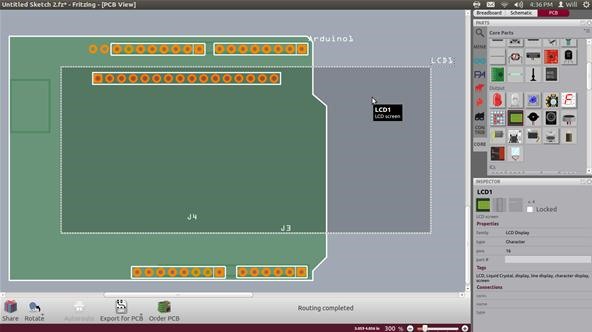
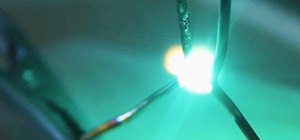
I decided to make an LCD shield to make interfacing with a screen easier. LCDs require a bunch of Arduino pins and having a pre-made shield will cut down a lot on prototyping time.
Drag your components over the board and orient them.
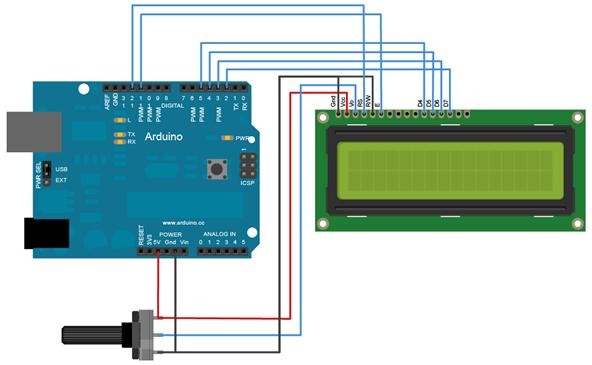
Now, start wiring it up! You can do this in the breadboard, schematic, or PCB tab, but I find it is easiest to just stay in the PCB tab for this step. I used this wiring diagram from the official Arduino website to hook up my screen.
Make connections by clicking and dragging from one lead on the board to another until all of the connections have been made. It doesn't have to look pretty.
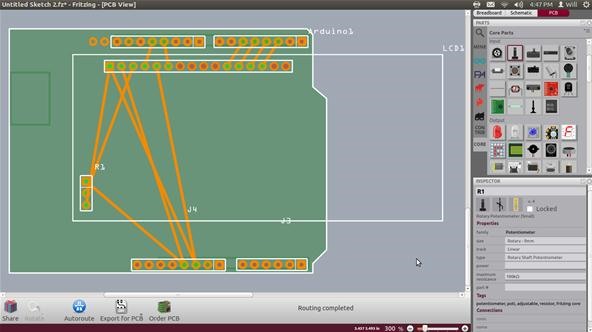
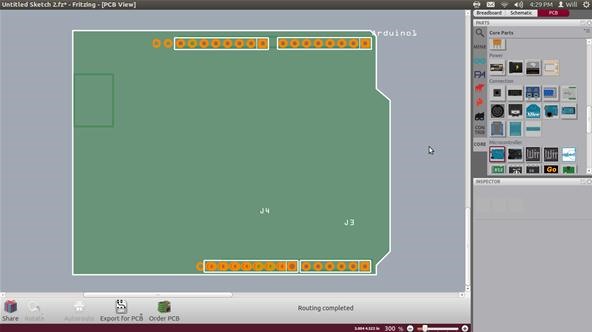
Click "Autoroute" and let the computer sort out the rat's nest.
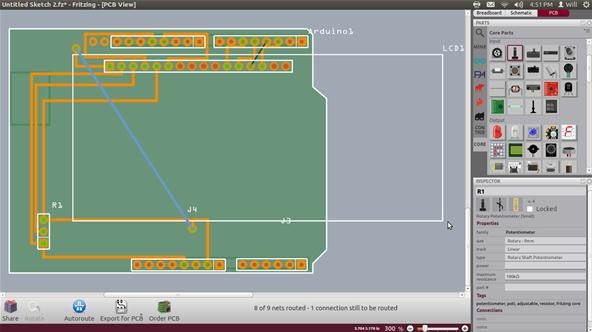
Now you can go in and clean up the design. Depending on how many traces you have, you may be forced to use a jumper wire somewhere in your circuit. The light blue line above is a jumper wire for a trace the computer could not fit onto the board.
Here is the board after I manually tweaked the trace placement:
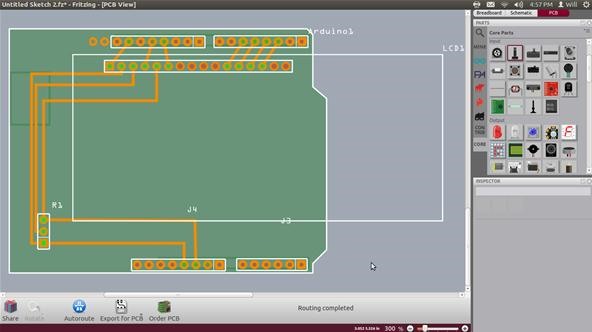
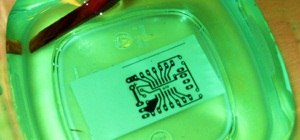
Make sure the trace widths are to your liking and click "Export For PCB" at the bottom of your screen. There you go! A perfect pattern for etching your first prototype shields! Etch, solder, and test your new shield to see if it will work for your future customers.
Remember that when you get the boards professionally made, the silk screen layer will look awesome! Label everything with silk screen including the Arduino pins on your shield.
Step 2 Professional PCB Orders
DIY is sufficient for all of your personal needs, but when it comes to selling kits, you're going to want the best board quality possible.
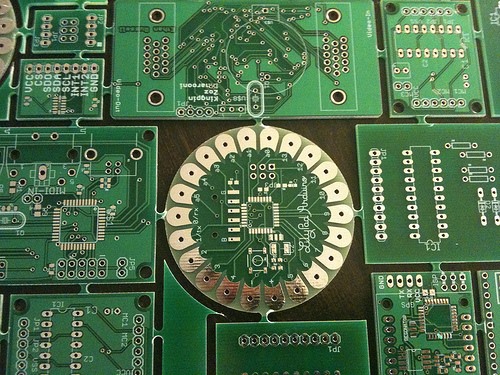 Image from dorkbot
There are innumerable PCB factories you can choose from. Here are the two cheapest and most reliable services I am aware of:
- BatchPCB: Run by SparkFun Electronics, BatchPCB is a place to order custom boards, as well as buy and sell other's board designs. BatchPCB gives you the option of 2- or 4-layer boards, which means you can get some really complex circuits going on! The price is reasonable and SparkFun is great to do business with.
- DorkbotPDX: Similar to BatchPCB, Dorkbot offers a service whereby many board designs are accumulated and sent into the manufacturer as one giant order. They cost a dollar more per square-inch than BatchPCB, but there is no setup fee. I have heard many people say they were pleased with the final product. All the boards are purple, so keep that in mind.
Step 3 Kits
Your PCBs are just one part of the kit that you'll eventually sell. Put together a practice kit of all the components needed for your gadget. Try different kinds of switches, knobs, LEDs, etc. to see what works best in your project.
Once you have a finalized parts list, gift a kit to a friend and see if they have any trouble putting it together. Revise the parts and if needed, include a website URL with directions for assembling your kit. Repeat until your friend can assemble your kit without any help from you. Now you are ready to think about the uncomfortable part—business.
Step 4 Pricing
Luckily, Arduino shields have an average price from 30 to 40 dollars. Your shield price will depend on what kind of components you used. If you made a GPS shield, your cost and price will be higher than if you made a shield with a single LED light. Count the cost of your shield and write it down!
 Image from youthoughtwewouldntnotice
- Component cost: Add up the price of all your components including thePCB. If you end up selling a lot, you can eventually lower the cost of components by buying in bulk, but for now, calculate the component cost based on the individual unit price.
- Labor Cost: How much time do you put into making kits? Sorting, packaging, mailing, and receiving all take up hours of your time that you need to be compensated for. Calculate how many hours you work per kit. Here is where you have some leeway. I calculate my hourly rate at 15 dollars. You can change yours depending on need, customers, average cost of reproducing labor, power in your area, and whim.
- Shipping: Shipping costs money. Choose the class of mail you will use (First Class, Priority Mail, etc.). Find the cheapest packaging available that still sufficiently protects your components. You may want to get some static-free bags for the kits to prevent static discharges from frying your components en route. Add up packaging and shipping charges, then add to your total per kit.
Now that we have a final cost for each kit, multiply that number by 1.66 to get your selling price. Capitalism is a tricky con and you can mess with the price all you want. It's easy to lose money if you buy too many kit materials or give away a lot of kit packages. The bottom line is that you are working for yourself and any money you make is going to come directly from exploiting yourself. Work hard and you may make money!
If it is too much work for one person, join up with other makers and start a kit cooperative. A cooperative is a business wherein all workers are also owners and all decisions are made democratically. It's a lot like a hackerspace.
Step 5 Website
We are all ready! We have a gadget, we have a board, we have components, we have packaging, we have everything we need but customers! Patience. They will come.
My website is hosted by WordPress. There are some differences between wordpress.com and wordpress.org, so make sure you read about each if you are considering a WordPress site. I find that WordPress has just the right balance of pre-made templates and easy customization. They have many good layouts and would more than suffice for a kit store.
Setting up a website for your kit store is a great way to reach a lot of people. PayPal makes it simple and safe to accept payments online and can be integrated into most blogs. You can use any site to sell your kits from LiveJournal to Tumblr, but here are some things to think about when deciding on a web host.
- Is e-commerce allowed? If not, find another site. Wordpress.com does not allow e-commerce. My actual store button links to a Google site.
- Can I link to my kit site with a custom URL? Say, fakekitsite.com? This is a great way to look more professional and help people find your kit. Most blog hosts will let you use a custom URL.
- Does anyone still use this host? If you are on LiveJournal and your kit has nothing to do with fan fiction, you may want to look elsewhere.
- Is the blog customizable? Having a custom look will make your kit seem even more special and consumable.
Step 6 Advertising
This is where most people get stuck. You may have a kit for sale, but nobody will take a look at it. There is nothing you can do to specifically get your one kit more traffic. You should be constantly making new stuff even if you are not preparing full kits. If your projects are interesting, they will get attention. The only surefire way to build up Internet traffic is to keep publishing interesting stuff. Once a few of your more badass projects gets picked up by some bigger websites, you will begin to get traffic on your kit site.
Do not pay for advertising. Modern advertising is a study in creating false needs by manipulating subconscious emotions. It works for the benefit of those who already own productive property, tons of money, public offices, guns, or more usually, all of the above. Your work is your best advertisement. You don't need to sink to the level of a corporation.
That's It
There you have it, the basics of how to design and sell your personal Arduino shield project. Do not forget to save all receipts and order forms for your taxes! If you end up making over 2000 dollars in one tax year, first off you are a lucky *****, and second, you will probably need to register as a business.
Look up the laws where you live to make sure you aren't inadvertently dodging taxes.
Final Thoughts
If you are going to dive all the way in, you will want to register as a business right away and open a bank account under that business name. Get a credit card under the business name, as well, and make all purchases on that card. Your expenses will be easier to track this way.
Some kits don't sell. If you have gone through all of the steps and find that your kits still are not selling, keep at it! Some projects just aren't received well by customers, but if you keep making new kits, some will sell.
Are you thinking about starting a kit business and want to ask for some advice? Ask away in the comments below or on our forum. Do you have experience selling your own kits? Share you experiences with us so we can make the right choices! We love hearing from you all.
Don't forget! We are currently accepting entries into our photo contest for a chance to win your very own lucid dreaming goggles kit! Just post a picture on the corkboard of a project you have made or are currently working on. All projects are welcome. Here is my example entry.
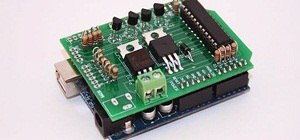
Main photo by biobug
Just updated your iPhone? You'll find new emoji, enhanced security, podcast transcripts, Apple Cash virtual numbers, and other useful features. There are even new additions hidden within Safari. Find out what's new and changed on your iPhone with the iOS 17.4 update.


3 Comments
BatchPCB and DorkbotPDX sites are jump to OSHPark now. I would much suggest to try Seeed Studio Fusion service for PCB manufacturing, 10 boards up to 100x100mm is only $4.9, which is much cheaper than OSHPark.
Is there any certification required for PCB shield before selling online?
Yes, I agree with Lavr Sin's idea. And OSHPark is good, their purple color PCBs are good. I also suggestion Makerfabs PCB prototype assembly service, which is friendly with makers and hobbyists.
Share Your Thoughts