

If you've never heard of geocaching, it's kind of a grown-up treasure hunt you play everywhere in the world. GPS coordinates are given as clues and the players must find the cache box. There is usually a log book to write your name and a small toy or present to collect.
The locations and clever hiding tricks are what give geocaching that secret detective/bounty hunter feel when on a geocache quest. But what if instead of following the coordinates, we just followed distance prompts like "you are 4 miles from the target". We'd be on a crazy chase all over town!
Today, we'll build a nifty GPS-enabled reverse geocache to give to your loved one. Give them a gift and a journey they will always remember.
Materials
- Box
- Breadboard
- Arduino
- 1N4004 or any 1N400X diode
- Momentary switch
- 330Ohm resistor
- 10KOhm resistor
- 10k Ohm trim pot
- 22 gauge solid core wire (multiple colors help a lot)
- Standard servo
- GPS module
- LCD (I used a 16X2)
- 5 volt relay
- 4 AA battery holder
- 4 AA batteries
- Female headers
- Male headers
- Scrap wood
- Large nail or metal bar
- Eye hooks (3)
- USB stick
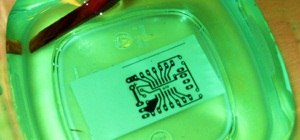
Step 1: Cut the Box
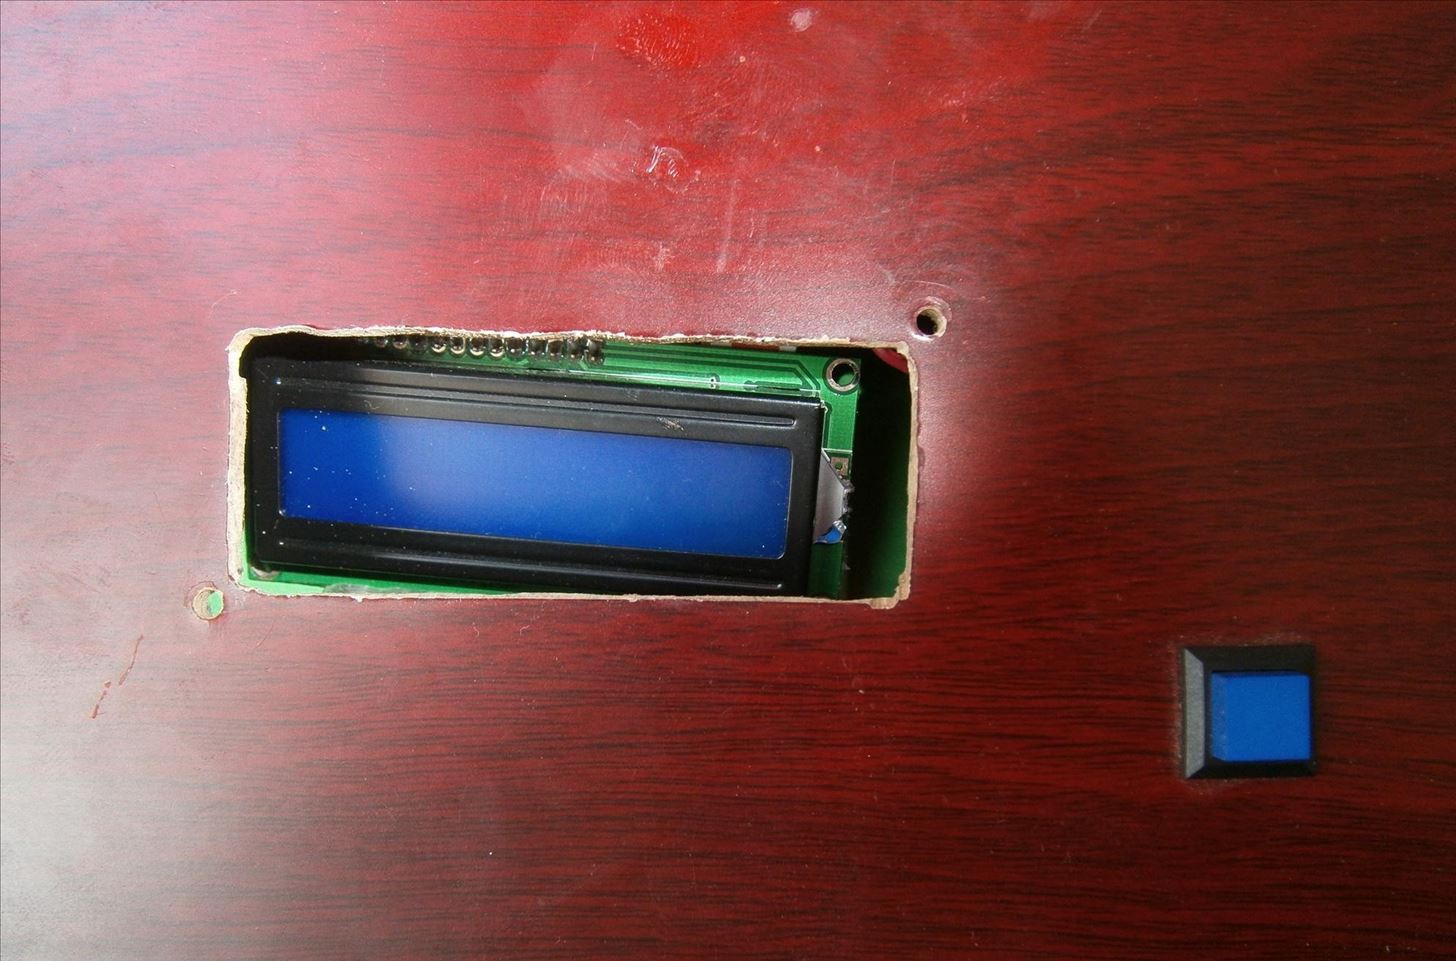
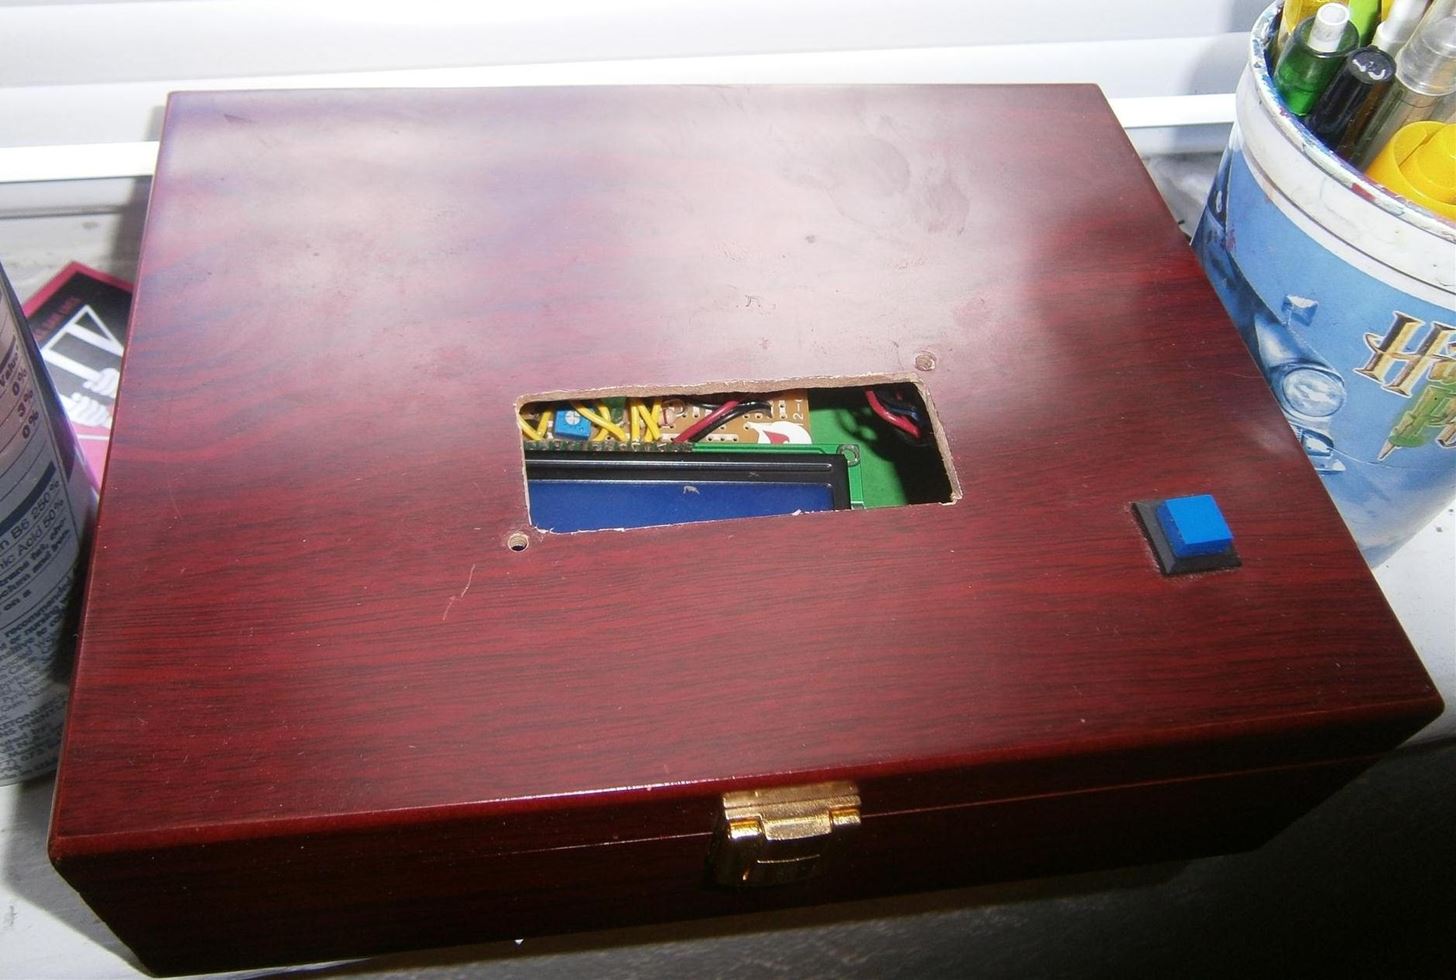
Cut two rectangular holes in the top of your box. Measure one to fit your LCD screen and one to fit your momentary switch. The nicer the box, the more careful you are likely to be cutting and measuring.
After cutting the holes, turn the box upside down and screw four small wood screws in the bottom of the box. These will act as legs and also the secret back door way into the box later!
Step 2: Components
We will be using several cool components and I would like to briefly go over them and direct you to some tutorials.
First we have the servo. This is a standard run of the mill servo with nothing fancy going on. If you have never used a servo with the Arduino board before, arduino.cc has a good tutorial here.
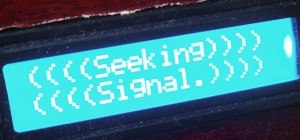
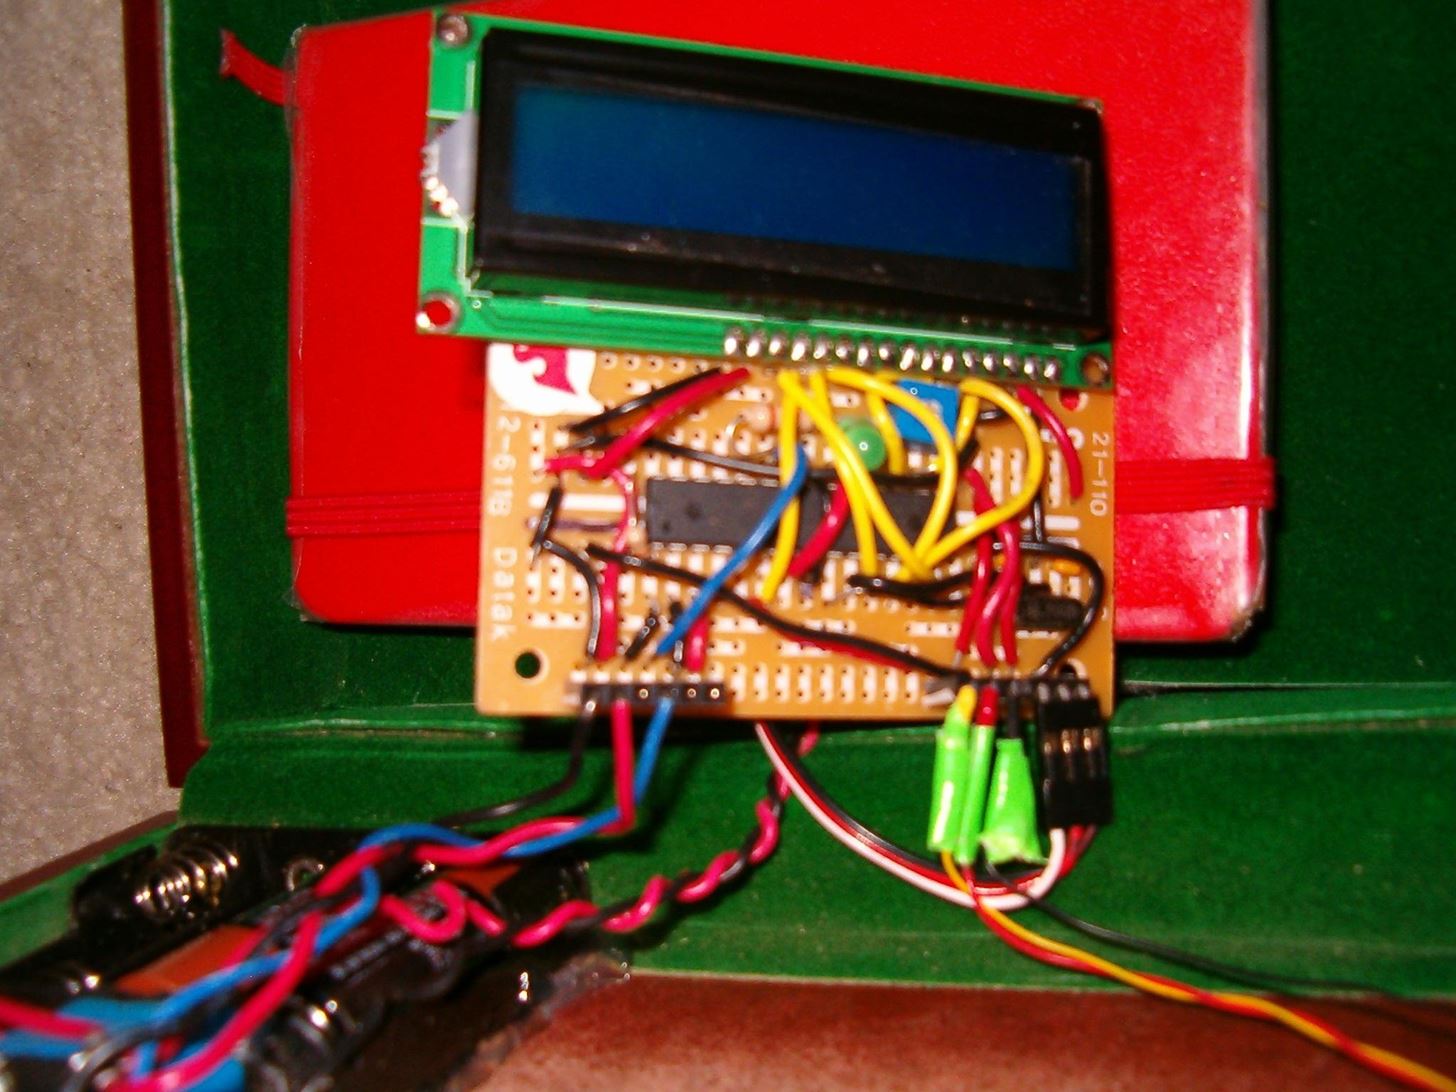
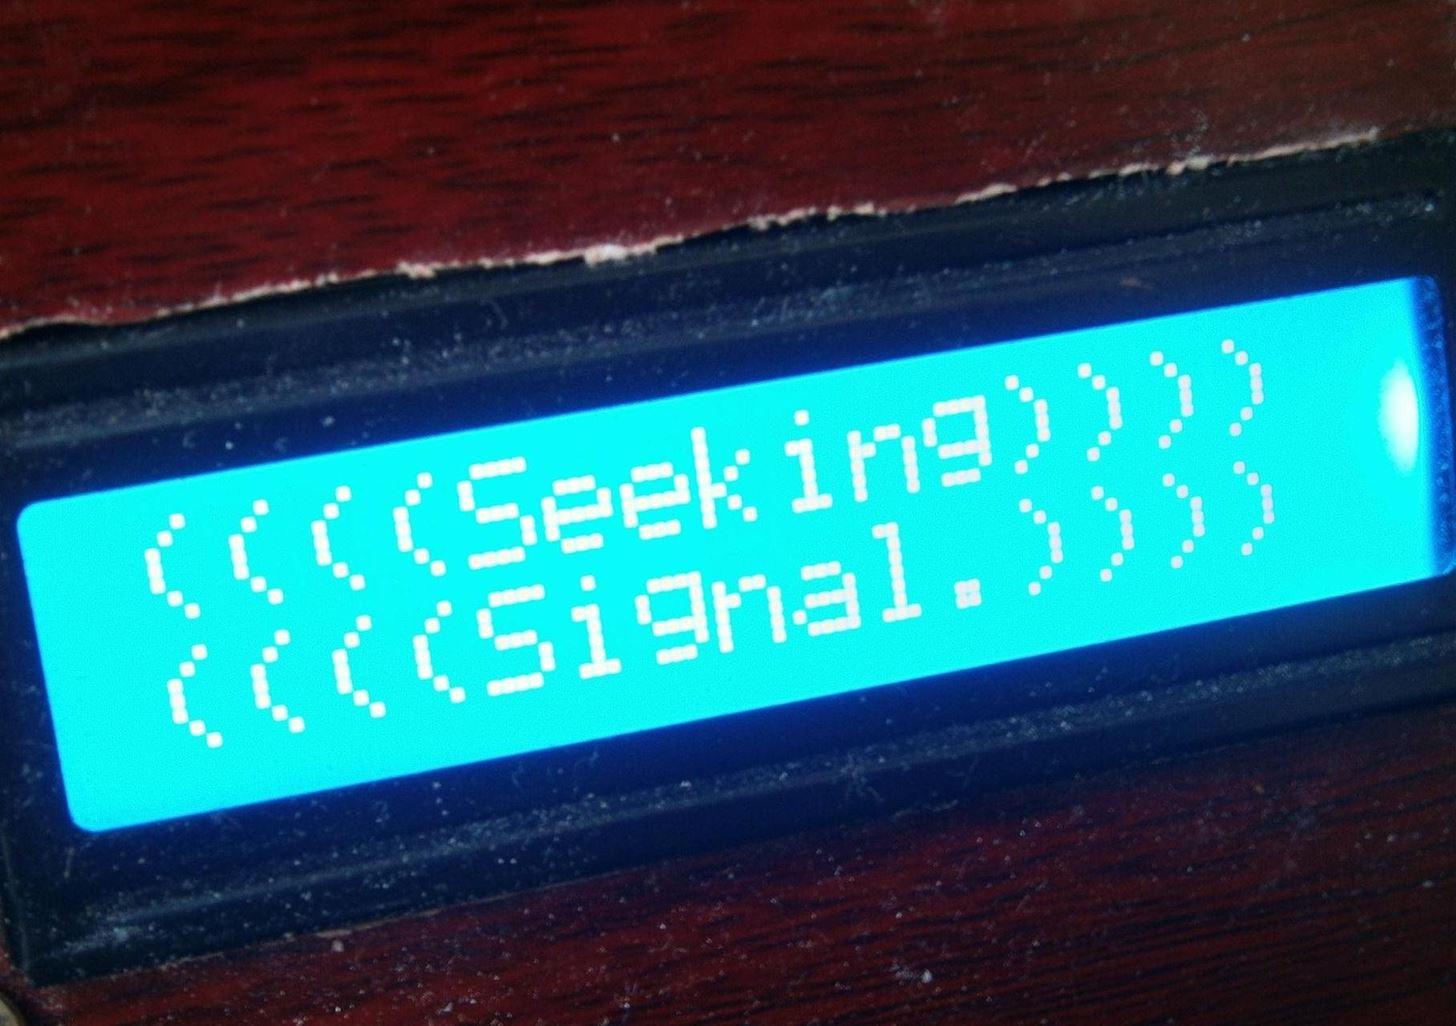
The LCD is a fun gadget. It displays numbers, text, and even some tiny pictures! The biggest thing to know about LCDs and Arduino is that LCDs need a lot of Arduino pins to run properly. Check out a great tutorial on LCDs here.
The relay we have seen before in other projects. Here we will be using it to save power while the box is off.
The GPS module is by far the coolest component. It's surprisingly easy to get a module up and running on Arduino. Try this tutorial first. If that gets too frustrating, try Mikal Hart's TinyGPS library. Our final program will be using this code, so it is a good idea to get acquainted with it.
I highly suggest you get all the components working individually before moving on to the next step.
Step 3: Circuit
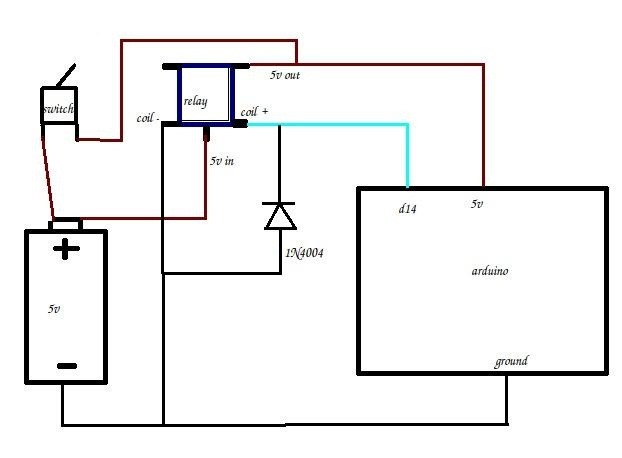
This circuit has a few more wires than I am used to fitting in a diagram, but here is what I came up with:
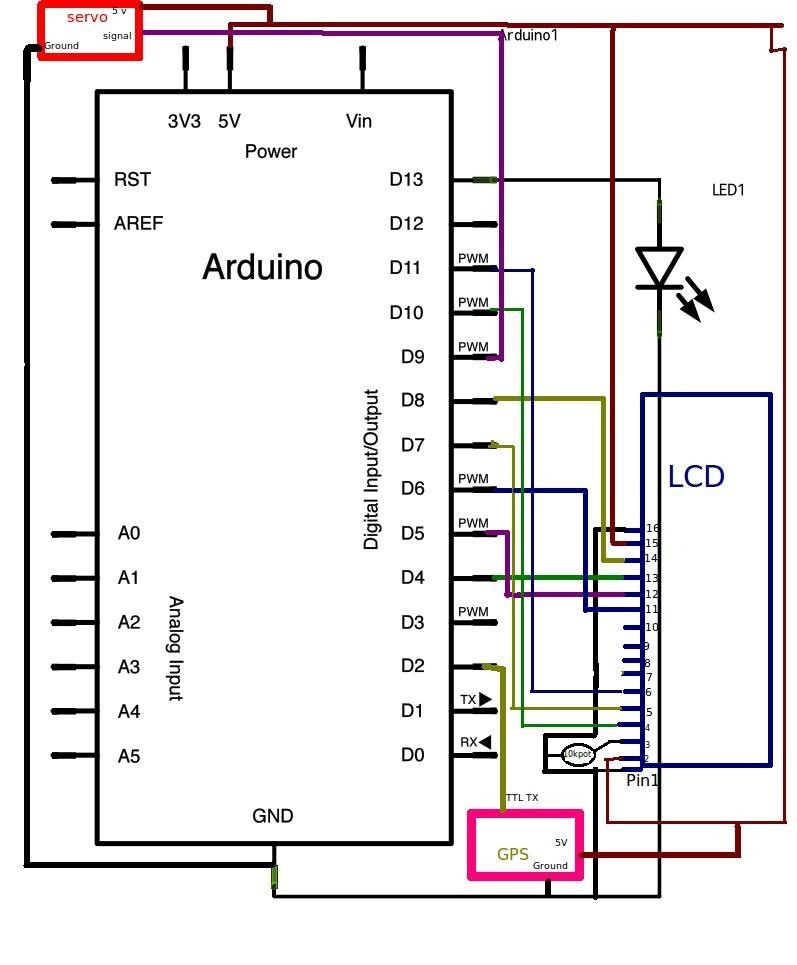
Above is the wiring diagram for the Arduino, GPS, LCD, LED, and servo.
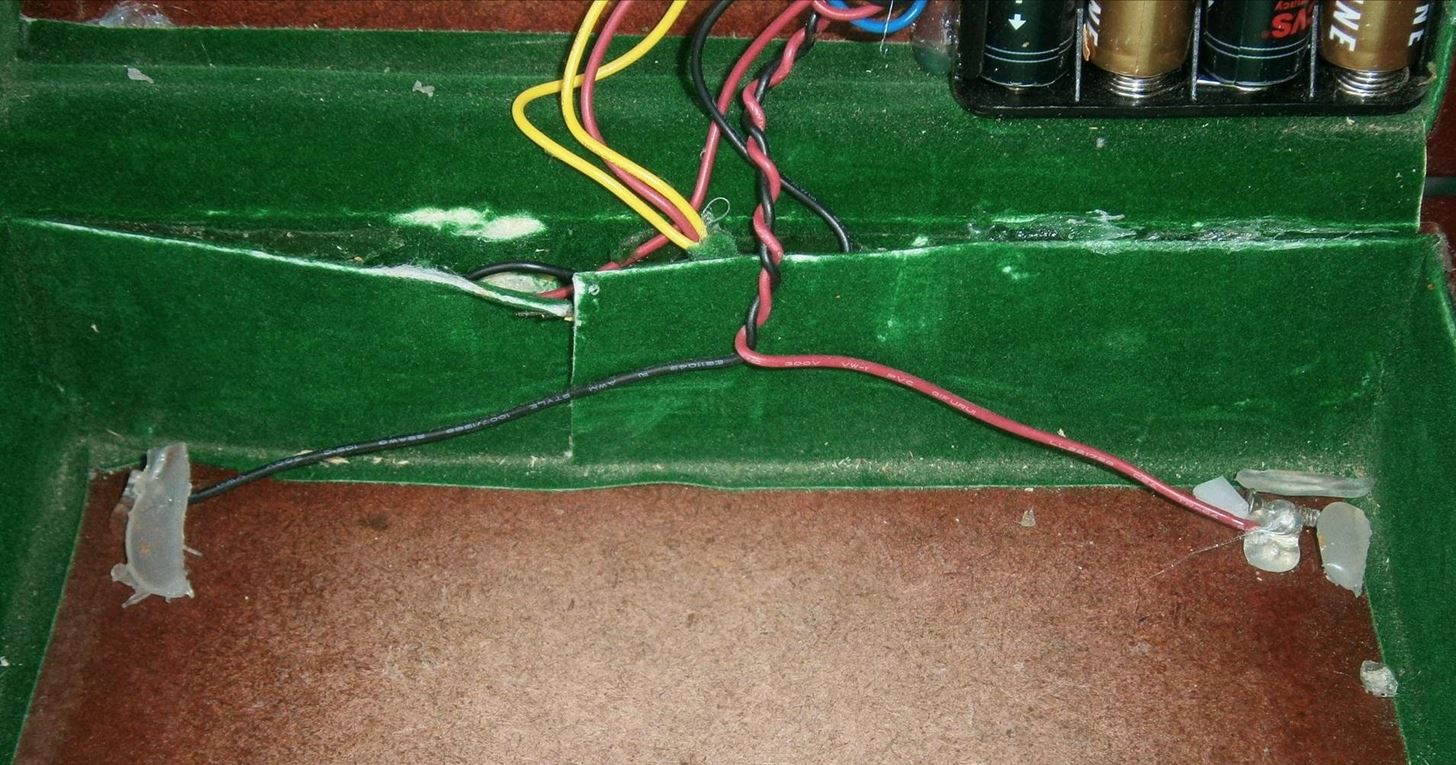
The relay circuit is shown below. This button on the lid of the box, when pressed, will set bring power to the Arduino. Once awake, the first thing the Arduino does is to turn on the relay, locking the whole box in "ON" mode until it decides to shut down.
Notice that the relay is always receiving power, but the Arduino pins on the relay coil determine when it sends that power to the Arduino. Our power system stretches the limits of the mind...
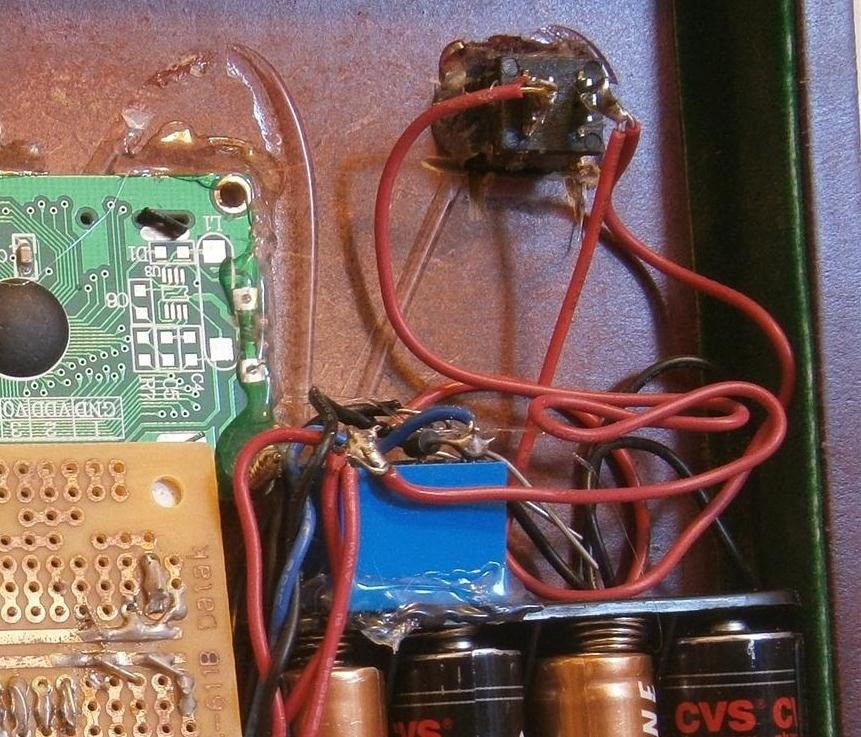
Below is what my relay circuit up looking like. At the rightmost is the button. The blue box is the relay and the left black box is the battery holder.
Step 4: Arduino?
You can use a regular Arduino for the box without changing around the wiring. I made an Arduino on the same board as my LCD Just to save space. If you don't use a full Arduino, make sure you have some way of programming your custom perfduino. I used this nifty FTDI breakout board.
Step 5: Install Servo
The servo lock is not complicated, but it will take a few adjustments to get it working correctly.
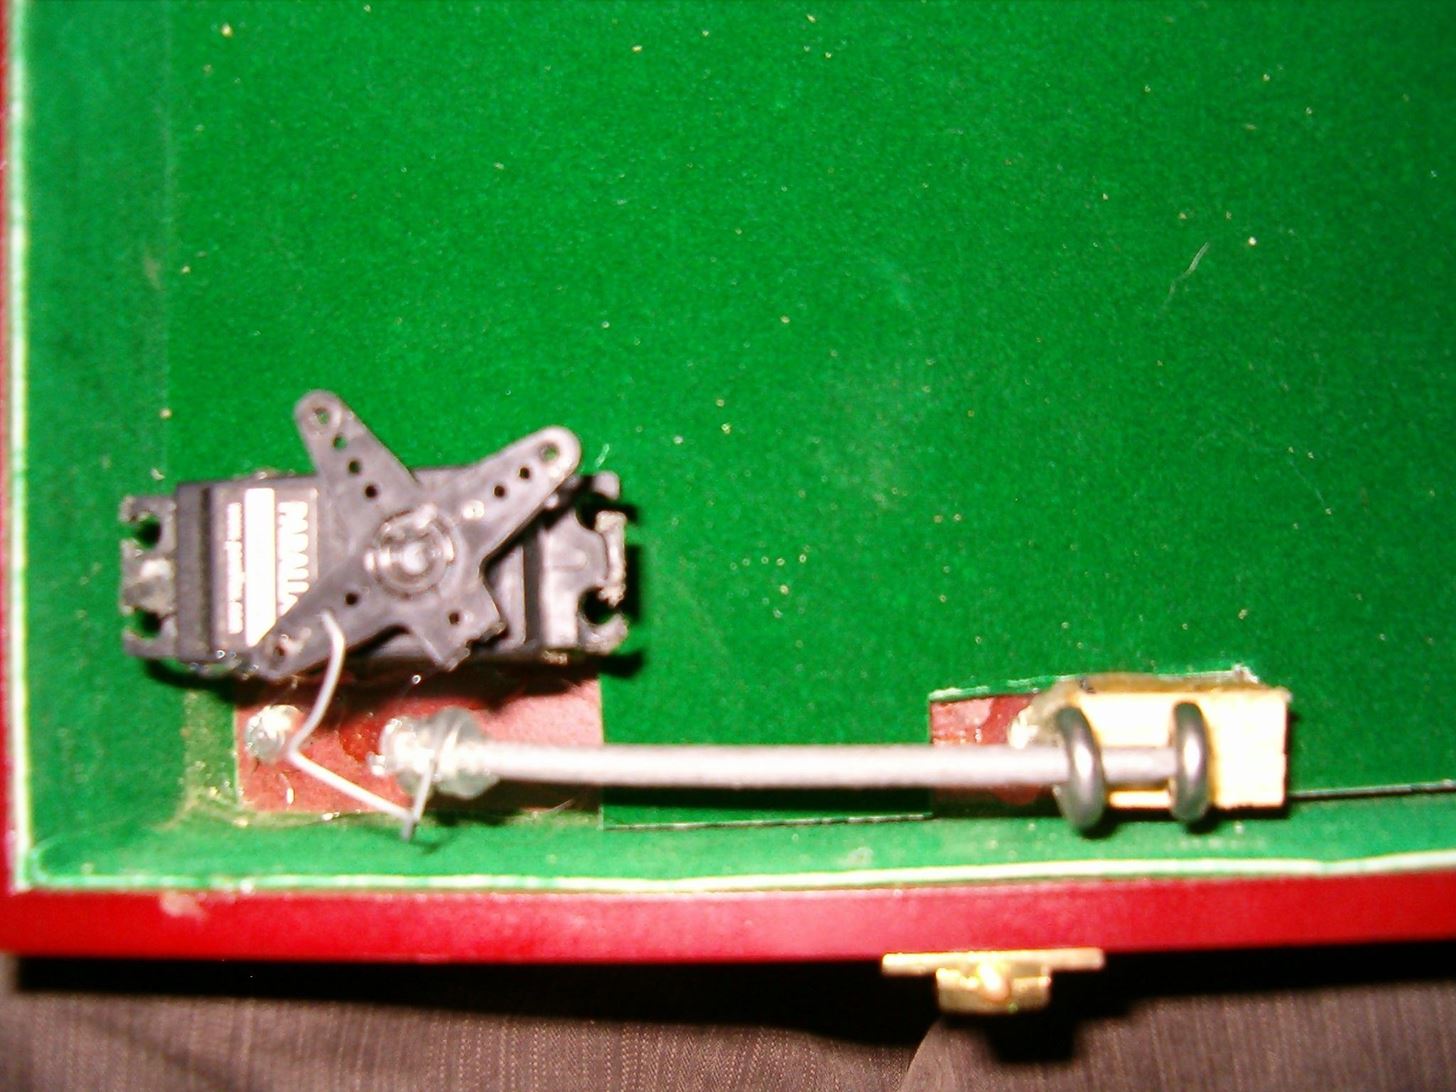
You can see from the picture that when the servo is activated, it forces the nail through the two eye hooks on the right. Be sure that the eye hooks cannot be easily ripped out! I used some scrap wood to make sure there was a sturdy connection.
On the lid of the box is one additional eye hook that rests between the lower hooks when the lid is closed. When the nail slides between all three, the box will remained locked until the right location is found.
Step 6: Secret Entrance
Soooooooo, the batteries died. Maybe your gift recipient waited too long. Maybe the last user forgot to change the batteries. Whatever happened the box is now permanently closed! Seeing as how we engineered ourself into a corner, we can probably engineer back out again.
My solution was to solder two screws to power and ground. The heads of the screws remain on the bottom side of the box as feet. Because they are exposed, we can use them to "jumpstart" the reverse geocache.
Solder two wires leading from the foot screws up to the relay as shown above. These secret wires connect directly to power allowing you access any time you need it.
Step 7: Code
The software is based on Mikal Hart's "
Reverse Geocache" code from Make, Vol 25. Everything you will need to customize is commented in the code. Remember the LCD is 16 characters across, so if you want to center text on the screen, add some spaces before the words.
Things you may want to change with each use:
- Destination (get latitude and longitude by finding the location on google maps!) = line 46
- Name of recipient = line 105
- Distance from target necessary to open box (called RADIUS in the code) = line 48
- "Welcome to BLANK" message upon opening = line 158
- Maximum attempt reached message (I suggest having your URL display on the LCD if the maximum 50 attempts is reached.) = line 117
For an explanation of the Arduino libraries used, see Mikal Hart's blog.
Step 8: Pack Your Reverse Geocache
There are a few things you ought to put in the reverse geocache to make it interesting. Firstly, it is a good idea to put a physical log book and pen where people can write their names, what they put in the box, where their box opened, and maybe even an email address. I also suggest putting all the schematics, instructions to the secret entrance, and any pictures of the mountain range your friend just sent you caching over onto a USB stick. Hopefully it will catch a lot of photos from geotravelers. Lastly, write your email on the side of the box! If the batteries die or something goes wrong, people need to be able to get in touch with you and fix the box.
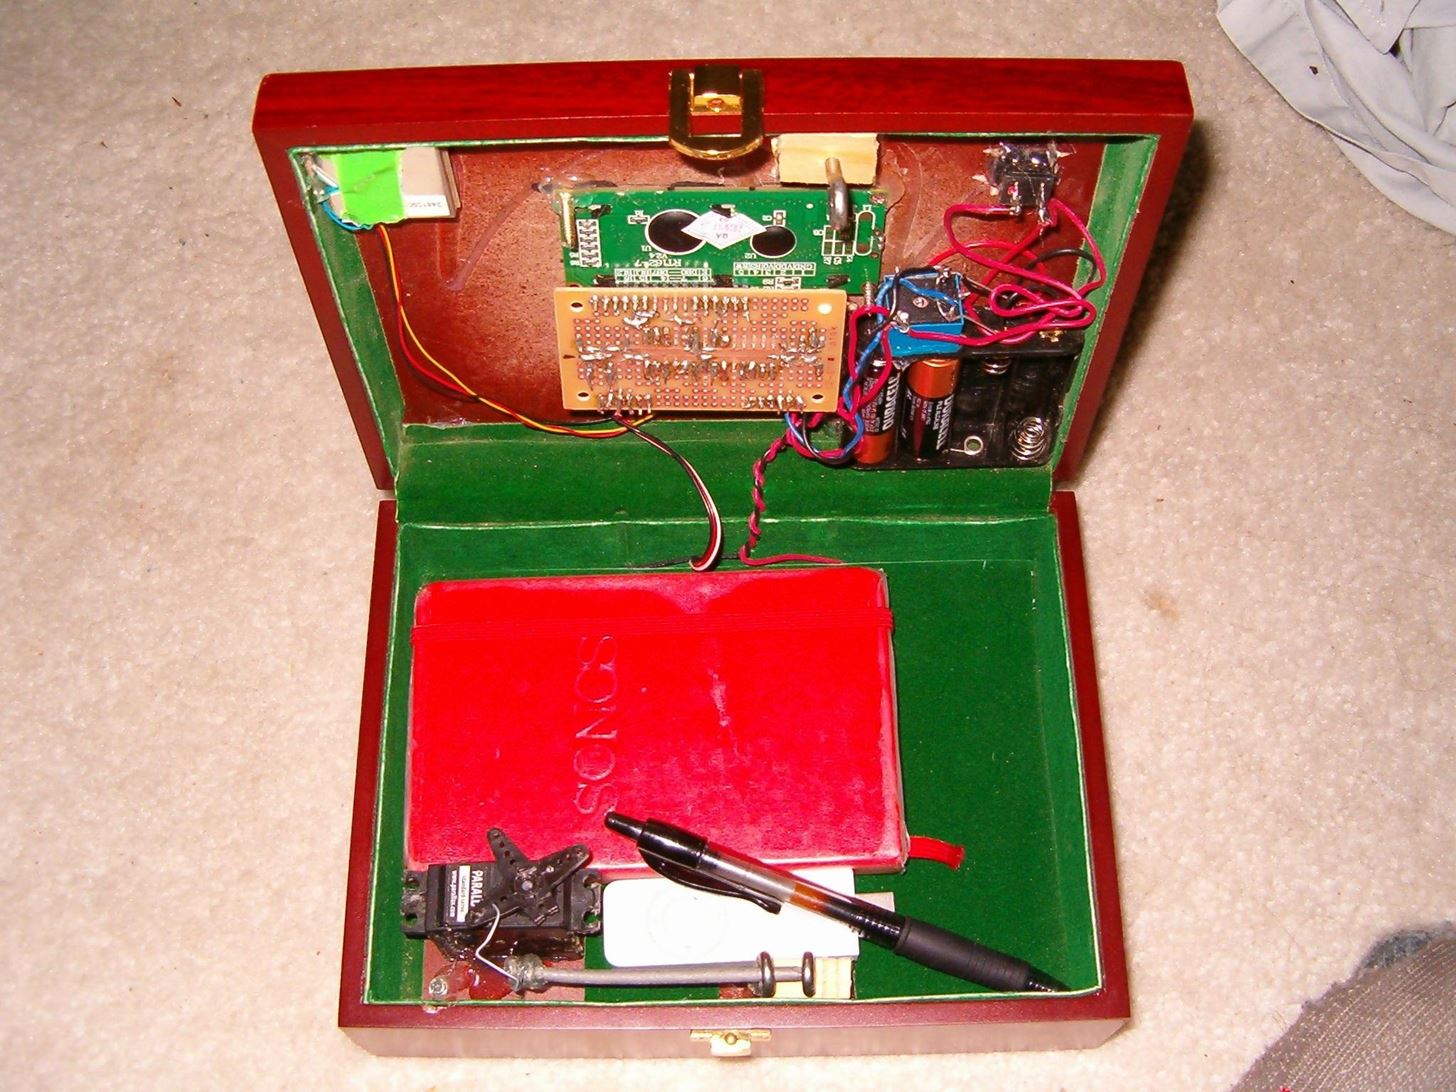
If you are planning on sending someone to say, the jungle, keep in mind that it gets wet and put all the goodies in a plastic bag before closing the box!
There we have it. A reverse geocache box! Now comes the hard part. You have to give it away! Pick a place. Pick a present. Send your friend on an epic odyssey.
Where would you want to be sent? What would you wish for when you open the box to see the prize? Let us know in the comments below and who knows, you may receive a reverse geocache some day! If you need any more pictures and schematics, I will be happy to make them up for you all! Feel free to ask here, in the forum, or message me personally.
Just updated your iPhone? You'll find new emoji, enhanced security, podcast transcripts, Apple Cash virtual numbers, and other useful features. There are even new additions hidden within Safari. Find out what's new and changed on your iPhone with the iOS 17.4 update.


1 Comment
I don't understand what's reversed about it.
Share Your Thoughts