

I think it's fair to say that every maker yearns for a 3D printer. You can replace circuit board connectors, fix your glasses, create ski grips, and make whole machines out of printed plastic parts—even a 3D printer. But without a 3D printer on hand, you can always resort to Sugru.
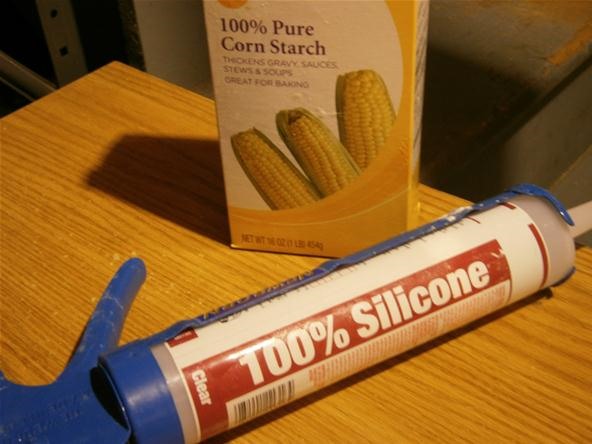
Sugru is a silicone rubber putty that dries semirigid and has super strength. While it is cheaper than a 3D printer, Sugru comes in tiny packages and in a limited number of colors. We need something cheap and customizable. So, today we make some DIY silicone rubber, aka Oogoo, using just cornstarch and silicone caulk.
Materials
- 100% silicone clear caulk
- 100% cornstarch
- Mold or object to copy
- Linseed oil paint
- Rubber gloves
- Face mask
- Goggles
Step 1 What to Make?
The possibilities with Oogoo are endless. Encase a phone, make circuit board bumpers, create a frisbee, cast robot parts—the world is your oyster. Whatever you end up making, you will need a mold of the object you want to create. You can use Plaster of Paris to make a mold of an original object.
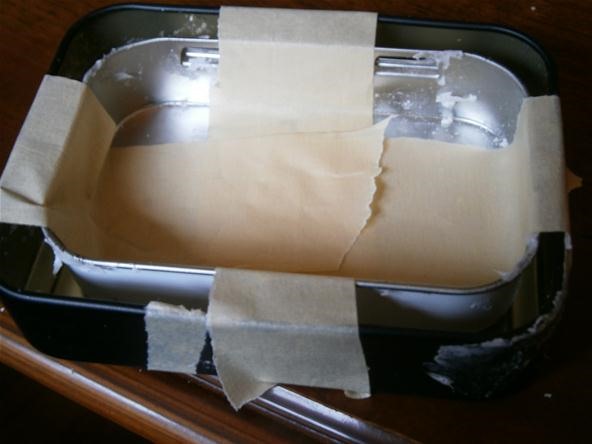
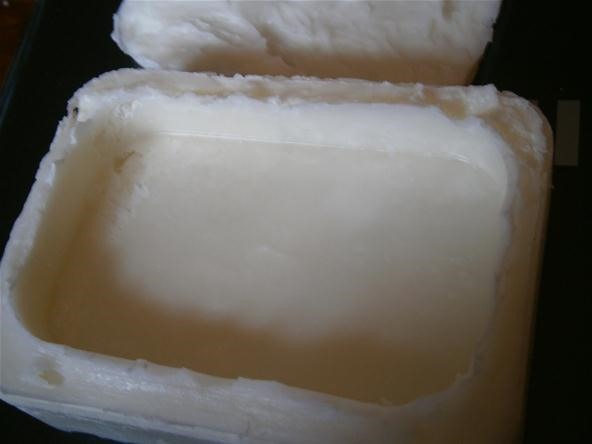
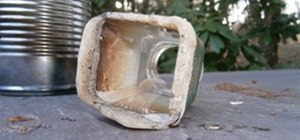
I decided to make a small project box for my first Oogoo casting. I placed one tin inside of another to create the space for the mold.
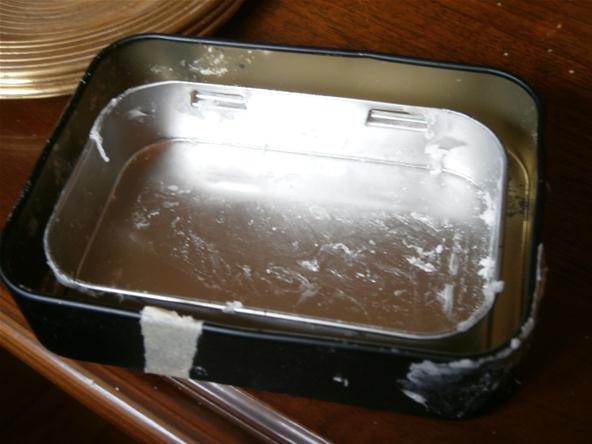
I taped the sides of the inner tin so as to suspend it and leave room for the Oogoo to flow underneath.
Step 2 Mix Oogoo
All you need to do is add some cornstarch to the silicone. Make sure you wear gloves as silicone is inherently evil and will piss you off for days if you get it on your hands. Some people complain of mild allergic reactions if not wearing gloves, too. Also wear your goggles and safety mask at this point. There is no real danger, but the fumes given off by the mixture are not pleasant.
I used a Dixie Cup to mix in. If you are filling multiple molds, you will want a bigger container.
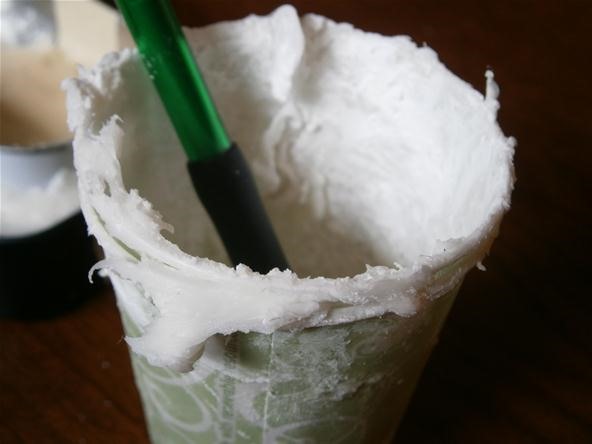
A one-to-one ratio of starch to caulk will dry in a few hours. Less starch means a longer drying time. I found that the one-to-one ratio was too thick and would not flow into the mold like I had wanted. I ended up going with a ratio of 2 parts silicone to 1 part starch by volume.
The mixture is tricky to stir, but keep at it! It will blend! Adding linseed oil paint now will give your Oogoo some vibrancy, as well as help you see when an even mix has been achieved.
Step 3 Set
Pour the mixture into the mold and let it set. Wait for at least two hours before examining your Oogoo. Remove the mold from the Oogoo by breaking the plaster or metal mold apart. You can also use a butter knife to pry the Oogoo out if your object has flat sides like the tin. Oogoo is very flexible and will easily pop out without breaking. It should have a shiny white finish.
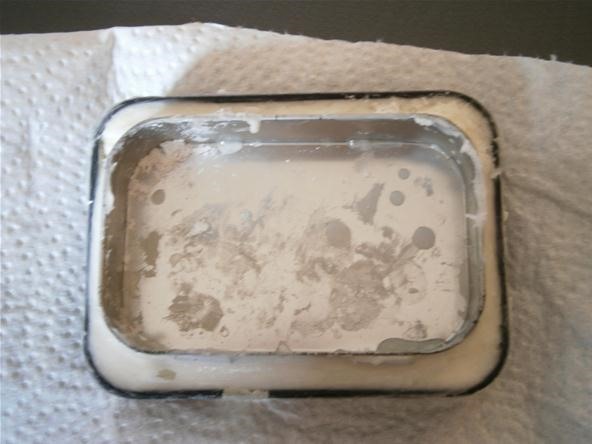
Oogoo peels easily off of plastics and metal.

Step 4 Profit
Now you are only limited by your mold-making skills. Play around with different ratios and see what works best for your projects. Remember, you can cast very thick objects like robot limbs as well as thin place mats and throwing discs.
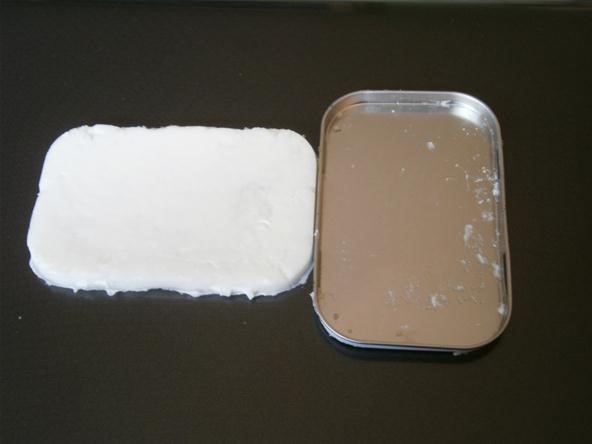
My first Oogoo attempt ended in failure. I use too much starch and the mix solidified too fast to take the full shape of the mold.
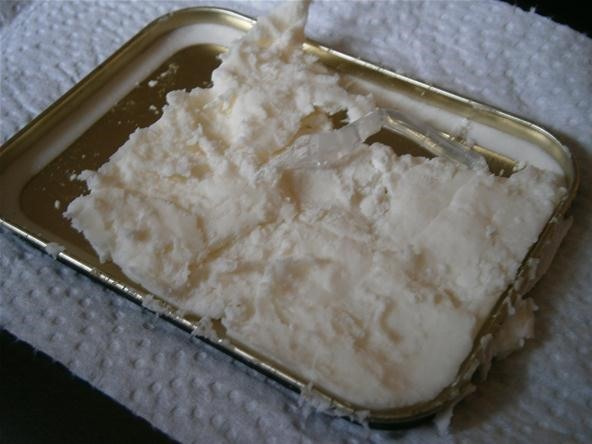
Despite the failure, the bottom of the Oogoo piece did come out shiny and flat!
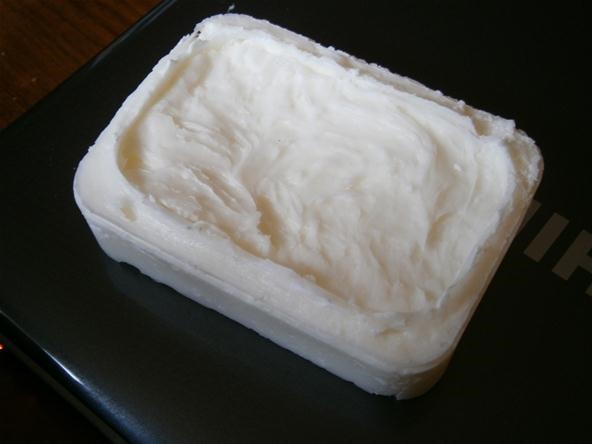
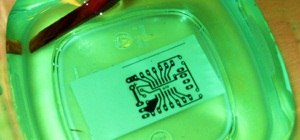
Now I have an Altoids tin mold made from Oogoo! I would like to embed some Altoids-sized circuits in an Oogoo mold. Oogoo would essentially act as a removable shockproof circuit board.
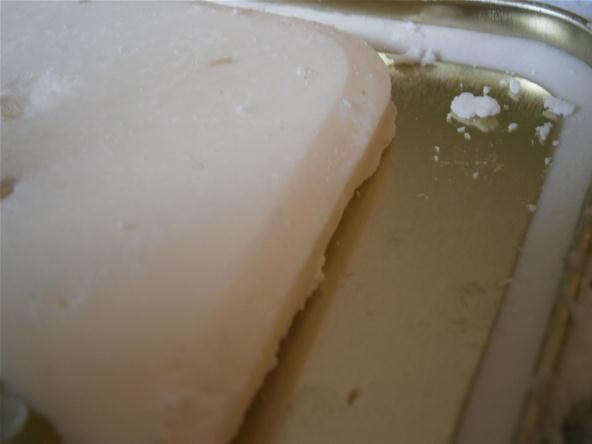
My second attempt at an Altoids lid casting went quite well!
The tin and body molds fit perfectly into one another
It would be easy to apply this same technique to creating valves, servo mounts, watches, and underwater electronics enclosures. Oogoo is definitely my new circuit board of choice for all portable projects. It's dirt cheap, waterproof, shock resistant, and customizable!
What would you use Oogoo for? Share your Oogoo projects with the whole community by posting them on the corkboard. Join the conversation in our forum and always feel free to ask questions in the comments below.
Just updated your iPhone? You'll find new emoji, enhanced security, podcast transcripts, Apple Cash virtual numbers, and other useful features. There are even new additions hidden within Safari. Find out what's new and changed on your iPhone with the iOS 17.4 update.


33 Comments
Awesome! Would this work (as in be safe) for electrical connections? For example, a power cord with "strain relief" i.e. Apple's MagSafe adapters.
yes
Any idea what it would take to "instant-dry" this stuff? I can imagine it as a cheap material for a 3d printer!
I'm not sure it is possible to dry it any faster than with corn starch.
a high-powered laser to heat-dry it in small sections, maybe? I'll have to make some up and play with it. Now that I'm thinking of it, maybe a corn-starch 3d printer hacked out of a dead inkjet...a layer of cornstarch that gets printed on with something that insta-hardens...I'll add a how-to if I figure something out!
If you figure it out, please post up some photos!
This is going to be a weird question but... Could you use this to somehow how make a full body silicone baby, doll, etc...?
Ya! You just need to make a baby mold.
Great, thanks for answering my question, I appreciate it...
would this be good to make a mask out of? if i made a head cast first
Yes but wait till it is fully cured to avoid breathing in the vapors.
I have been experimenting with Oogoo for some time now, every since I read about it on Instructables.com. I have found that you can easily color it with liquid food color almost any color you need. It is fun stuff!
Awesome! Thanks for the tip Jeff.
thanx ill do that
I would love to see some pictures of the mask!
and thanx jeff for answering another question iwas about to ask lol
i'll do that as soon as i decide the style
What is its specific gravity, boyancy, and hardness?
Its rather soft but very difficult to rip or break. I haven't tested it in water or weighed it. If you do please let me know!
Hey Will, would this be good for putting in a vacu-form machine to make, i don't know, an awesome stormtrooper armor set (halo, warhammer 40K, etc.)?
That's a good question. Do you have vacuum former? I cannot test it out but I would tale precautions not to get chunks of oogoo stick in the suction holes if you try it yourself.
not yet, I've been thinking about building one for a long time. a tutorial would be nice (hint, hint). building one is a lot cheaper than buying a professional retail model. i was thinking though, somehow, mold it and have it harden prior to actually putting it in the machine to form a plastic mold around. this would be a lot cheaper on organizations such as the 501st. it could also save a ton of time. This oogoo needs to be highly heat resistant though.
I'll see if I can fit a vacuum form build into my schedule
cool, thank you so much. reading a manual on how to do it is very hard for me to do. i'm a really visual person when it comes to complex things (not the oogoo of course, it seems pretty straight forward). also, can oogoo harden if it is baked in an oven or by a similar proccess?
I don't know if it can harden. Report back if you get it to work!
thank you sir. it is critical for it to harden if a cheaper armor making option is to be viable.
Silicone doesn't dry, it cures. It actually requires a small amount of moisture to set.
The corn starch is acting as a filler to thicken the silicone.
It is also distributing humidity throughout the silicone allowing it to cure internally. A light mist of water stirred into the silicone will do the same thing and won't reduce the tear strength as much.
Heating it will not turn it into hard plastic.
Thanks for the info Matt!
So, what does make it hard?
Silicone isn't a hard material to begin with. It is specifically designed not to be. However, there is always a way! Silicone is an additive to some plastics such as Peek. It is an extremely hard and durable plastic that is highly valued in the medical and food processing industries because it won't allow bacteria to grow on it. Silicon is just a thickening agent in the initial slurry though. But to answer your question, silicone by itself is not going to get hard. You have to add a polymer to it. Some polymers act better than others. But the most widely available and cheapest to acquire is polyurethane. Different poly types work better than others. But keep in mind that poly has to be melted and injected into a hot slurry along with the silicone or it won't mix. Silicone is lighter than most poly types so it will sit on top if not properly mixed and treated with acids. The acids then must be leached to create the final product. It is quite a process but it is doable at home if you have the time, patience, and the space to work with highly corrosive materials. Safety first!
I'm curious , is it safe for your health ? I mean .. My parents told me once that the silicon that we use for renovation can be dangerous or cancerous .. Is it true ? Could I use it for a costume ? Thanks for your reply
are these mold heat resistant? can I pour a heated fluid in them?
I used it to pour candle wax and even tin in it without any problems !
Share Your Thoughts