

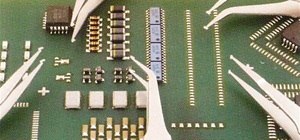
Whenever we make a homemade circuit, we use what are called through-hole components. Any components with long metal leads is a through-hole component. They are great for soldering to, but it's tough to fit enough through-hole resistors and capacitors into a smartphone. To get those last microns, we have surface-mount components for SMDs (surface-mount devices). These are all of those teeny, tiny things you see when you crack open your digital camera or laptop case.
Today, we go through the steps of soldering our own surface-mount components!
Materials
- Solder paste
- Syringe
- Circuit board
- SMD LED
- SMD button
- AA batteries (2)
- 2 AA battery holder
- Tweezers
- Microscope or magnifying glass
Step 1 Make Board
Just like we did before, we can design circuit boards in Fritzing. All of the components have a customizable SMD option. I am making a simple LED circuit for my first SMD solder project! Place down a button, LED and battery, as shown below.
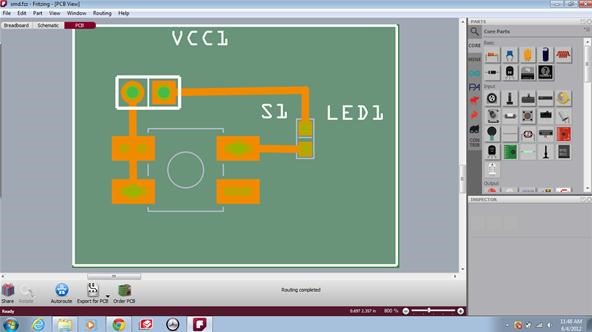
The top-left component is where the power wires are soldered. The large square component is the push button. The rightmost component is the LED.
Get the PDF etching file by clicking the "Export for PCB" at the bottom of the screen.
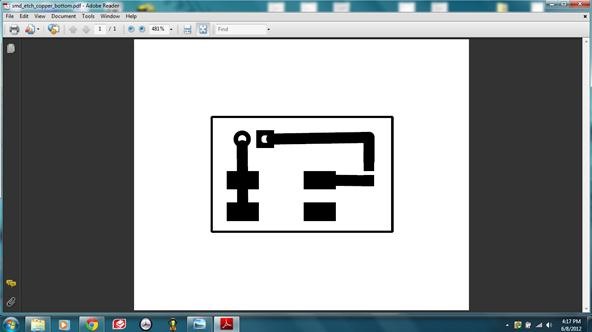
Etch your board according to the steps in our previous article here.
Step 2 Place Solder
Use a tiny syringe of solder paste to place dabs of solder on each electrical pad. This is an important and meticulous task. You can use a microscope or magnifying glass to inspect your solder paste on the board. Be sure there are no accidental connections where solder has oozed around the pads.
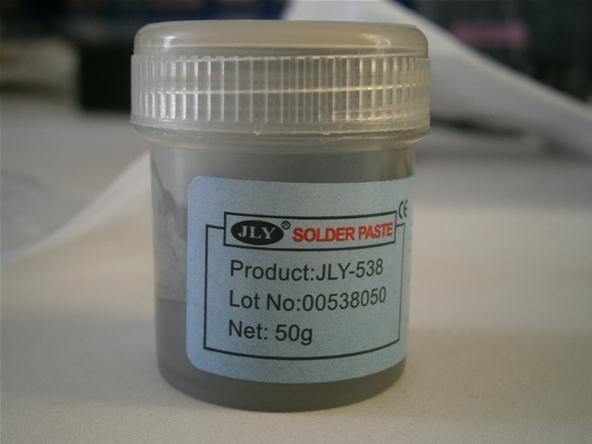
Make sure to store your solder paste in the fridge! It needs to stay cool to be effective.
Step 3 Place Components
This is near impossible to do with your hands. A pair of regular tweezers can work in a pinch, but there are special SMD tweezers that are perfect for the job.
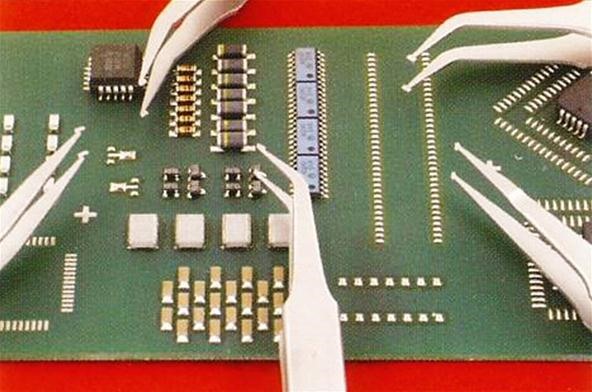 Photo by FarTech
If you are drinking a lot of coffee or just got rear-ended this afternoon, wait to do this step later. It requires a super steady hand.
Step 4 Reflow Solder
Now it's time for the magic. Place your board in the reflow oven and start the heating cycle. It only takes a few minutes for each reflow cycle. When the solder paste melts, it adheres to the metal pads on the board so that the surface tension of the liquid solder pushes the components into the correct orientation. This gives you just a little bit of wiggle room in placing your components.

Be sure to position the thermocouple temperature sensor near the upper surface of the board.
Step 5 Inspect
Give your board a few minutes to cool down before removing it from the reflow oven. Put the cool board under your microscope and inspect the solder connections. Test each connection with a multimeter to be sure those electrons are flowing! If there are any weak solder joints, apply a small amount of paste to the joint and put the whole board back in the oven.
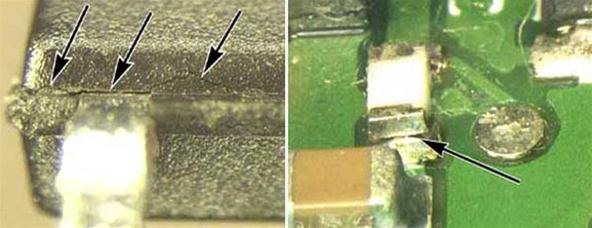 Photo by tls
Repeat until your board works like it is supposed to.
Step 6 Dream
Now that we can use SMD parts, we can make smaller and cheaper gadgets at home! SMD parts usually come in bulk in long strips. The strips are designed to be fed into industrial reflow machines.
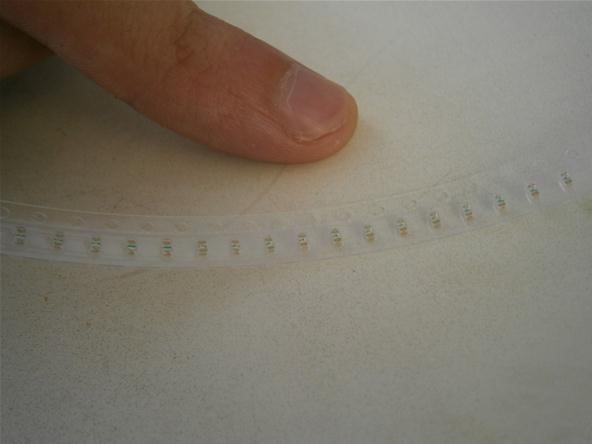
Yup! Those are green LEDs! I got a strip of 50 LEDs for just 3 bucks. You can get them even cheaper if you buy a whole reel.
I plan on making a GPS home-finding watch with a ring of directional LEDs on the outside. I have a super cool pocket watch that has been waiting for me to master reflow soldering. What kinds of small project enclosures would you use once you have a reflow soldering station? Share your ideas in the comments below or post in the forum. If you have a project you'd like to show off or found one you want to share, post it on the community corkboard so we can all bask in its awesomeness.
Just updated your iPhone? You'll find new emoji, enhanced security, podcast transcripts, Apple Cash virtual numbers, and other useful features. There are even new additions hidden within Safari. Find out what's new and changed on your iPhone with the iOS 17.4 update.


Be the First to Comment
Share Your Thoughts