

Bikes are a great form of transportation. They use human energy more efficiently than any other machine. You can keep it in your closet or hallway. You can even take it on the train in a pinch. However, this portability is also the bike's biggest draw back. If you own a bike in the city, chances are it will be stolen. Locks barely deter thieves armed with bolt cutters and crowbars. Throw the bike thieves for a loop and make a tilt-sensitive alarm. It will hopefully startle your bike's assailant enough to make them think twice about stealing your precious!
Materials
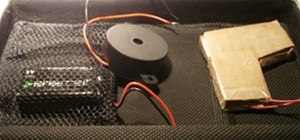
- Cardboard
- Hot glue
- Tape
- Aluminum foil
- 9 volt battery
- Piezo buzzer
- Enclosure or box
- Hard drive magnet
Step 1 Make a Tilt Sensor
Tilt sensors are electronic components that sense when an item shifts from one angle to another. Usually, a rolling steel sphere will complete an electrical connection at either end of a tube. When turned one way, the sphere connects the left side. When turned the opposite way, the sphere rolls down the tube and connects the right side.
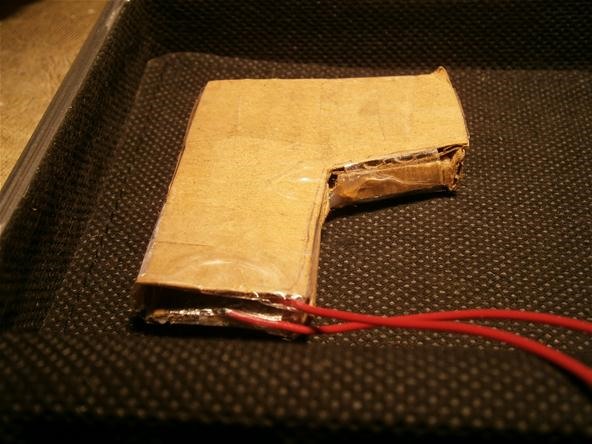
While tilt sensors are cheap enough to buy, I decided to make one from cardboard. My tilt sensor is roughly "L" shaped.
Below you can see the parts lain out on the floor. The steel washer will rest at the top of the cardboard enclosure. When tilted, the washer will roll down to the lower section and be stuck there.
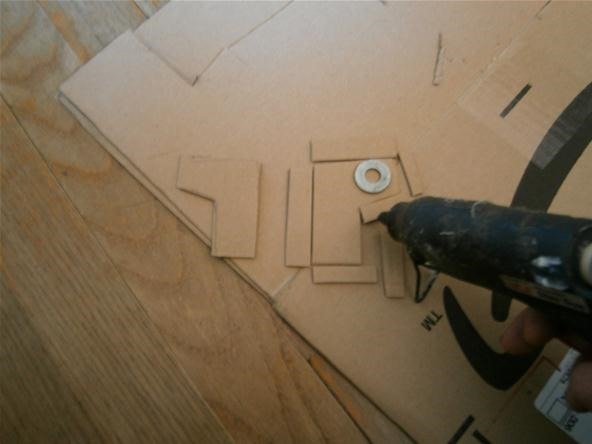
Hot glue the side pieces making sure to keep the inner edges clear of glue so that the washer can roll smoothly.
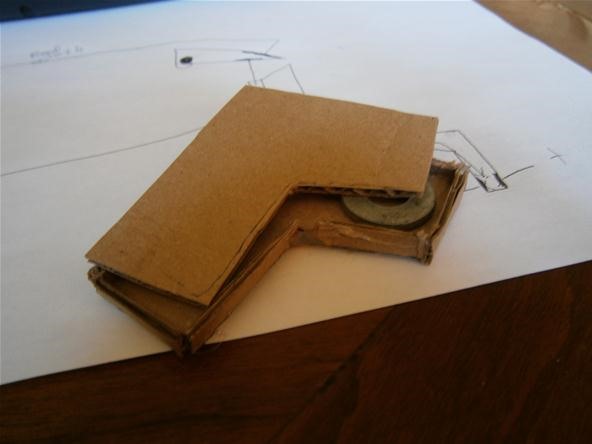
Tape a stripped wire to the back side of a piece of aluminum foil. Glue the foil to the bottom section of each wall.
Make sure the two aluminum sheets do not make contact while you glue the sensor closed.
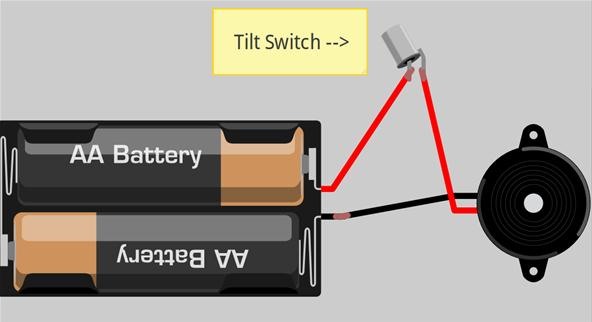
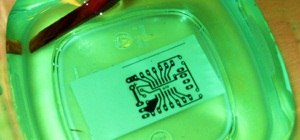
Step 2 Circuit
Our circuit has only three components. The positive lead of the battery connects to the tilt sensor. From there, the other tilt sensor lead connects to the positive lead of the piezo buzzer. The negative lead of the buzzer connects to the battery ground, completing the circuit.
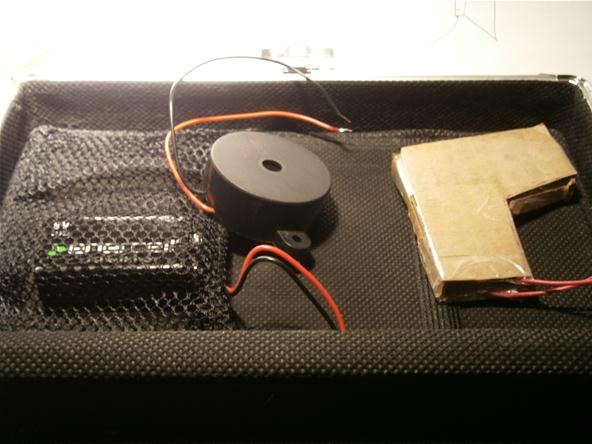
Step 3 Install the Alarm
Though this alarm is installed in a box, you could just as easily conceal the whole circuit under your bike seat. I placed my alarm in the front bike basket. Set up your bike so that it is leaning the correct way, plug in your alarm, and try to ride away!
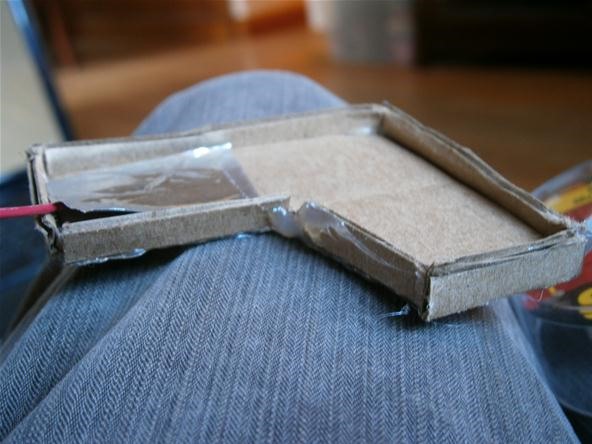
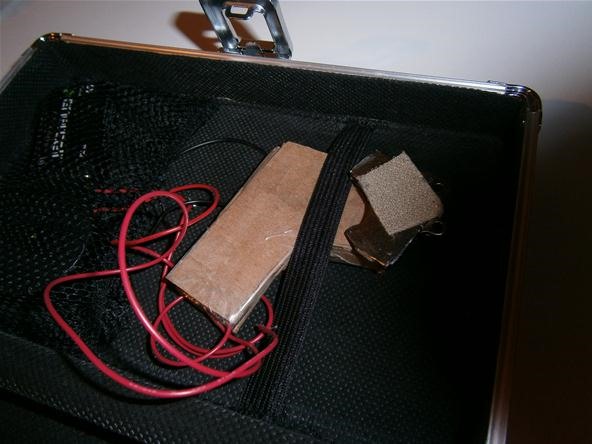
The alarm should start producing a constant high pitched tone. The great part about this alarm is that you can disarm it by turning it upside down or by using a magnet to hold the washer in place inside of the sensor.
Below, a hard drive magnet keeps the washer away from the foil contacts at the bottom of the tilt switch.
Thoughts
There are many ways to make tilt sensors and bike alarms. This is merely the simplest. Adding a microcontroller could give you a lot more options for buttons, noises, lights, etc. If you really want to startle your bicycle thief, I suggest rigging up some of these car horns.
Tilt sensors are great for triggering pranks, too! Show us what you do with your alarms by posting on the Mad Science corkboard. If you are stuck on this project, don't hesitate to message me directly or ask in the forum.
Just updated your iPhone? You'll find new emoji, enhanced security, podcast transcripts, Apple Cash virtual numbers, and other useful features. There are even new additions hidden within Safari. Find out what's new and changed on your iPhone with the iOS 17.4 update.


11 Comments
if you use car horns you will need i big battery :p
Rated Voltage: 12V
Rated Current: 8A
Truth, the horns need a lot more power. I would go with some thin cylindrical batteries mounted inside the seat post and inside the seat.
I'm still not shore if it wil work then cuz you need 8 Ampères. I wanted to put a car horn on my bike and it was inposible cuz the battery wasn't strong enough.
If you look at the video at the bottom of the product page, They use a pretty small battery and a relay. I'm not sure, but I think it is this battery: http://www.sparkfun.com/products/10470
What video do you mean because the battery you gave a link for won't sound a horn. :D
hmm If you are up for an big project you could do it with 30 or 40 AAs. I'd like to see some bike tube battery clip designs.
This wil cost you a whole lot. If you asume your batteries are 1.5Volt and 2000mAh you wil need 8 in serie batteries to get 12 Volt then you will need a whole lot of 8x batteries in parallel to get your 8
Ampère.
yup it'd be super fun to make a case for that many batteries!
I was referring to the video at the bottom of the car horn product page. I suspect they ran the horn on 11 volts
Get an airzound, and actuate the button with a solenoid, It would only last for about 20 seconds, but you could run the whole circuit off of a single 9V. Plus the cost of doing that would be about $50 compared to at least $60 for the batteries for a horn alone.
Thanks Carbon Nanotube. I'm not exactly clear on how to implement the solenoid. Could you explain further or post a drawing on the corkboard?
May I have the circuit diagram of the project?
Share Your Thoughts