


I have an absolutely wonderful time making projects and writing articles for all of you mad scientists! Today, I will bring you behind the scenes for a look at the workbench, tools, and software that make the Mad Science World possible.
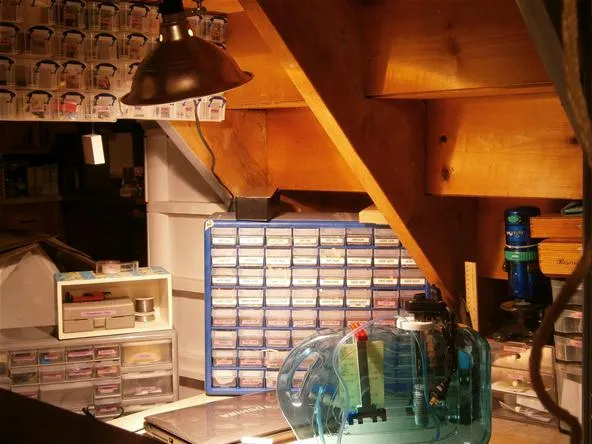
Above is my beautiful workbench! My whole lab fits under the basement stairs, so I have to be extra organized to keep it compact. Let's start off with a look at the right side of the bench.
Workbench
I keep chemistry related things in this corner of the lab.

A digital scale is a must for any home chemist. Without a scale, you're left guessing at proportions and can easily ruin an experiment. A mortar and pestle is very useful when you need to create powders for sugar fuel.

I keep all slides, droppers, specimen jars, and tweezers in the top drawer for quick microscope photos. Microscopes are also great for taking photos of plants and insects.

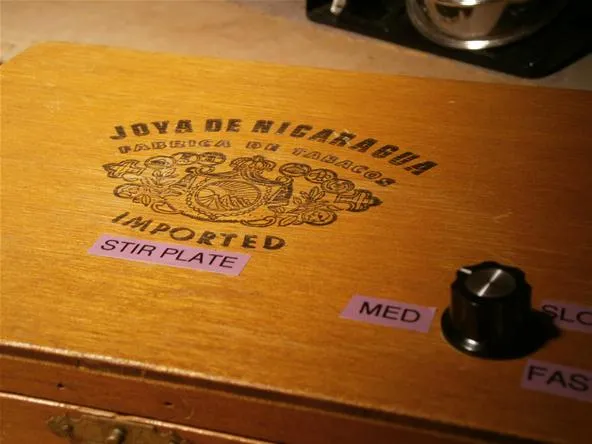
Above the chemistry drawers are two cigar boxes. One is a magnetic stir plate for zero effort chemical mixing. Very useful when you don't want to contaminate a solution you are mixing.
The other cigar box has my travel prototyping tools including a miniature multimeter, a long lasting 9 volt battery, and breadboards. It is really useful to have a prepared box of prototyping materials when you need to debug circuits on the road.

Beside the chemistry drawer is the beginning of the electronics section of the bench. This drawer holds all my perfboards and blank PCBs, as well as an assortment of AA and AAA batter holders. The bottom drawer is for random yet important pieces of paper.

Moving on to the center of the workbench, there is an office desk organizer containing my most used tools. There is a desoldering pump, etch resistant marker, Sharpie, plastic scoring tool, screwdriver, diagonal cutters, ruler, X-Acto knife, and a pen.

The two most important tools of all are the variable temp soldering iron and the automatic wire strippers. If you have the space, I suggest getting a nice soldering station with an enclosure and temperature dial. For the limited space I have, this adjustable iron is perfect. If you are still stripping wires by hand, stop immediately and get one of these automatic strippers. It is literally the best investment I ever made in my lab.

Below are my component drawers of epicness. 64 drawers or electronic parts neatly lain out for quick and easy access. If you don't know what kind of circuit you will have to make at a moment's notice, a full component drawer is the only solution.

The chips I use the most are the 555 timer, the ATmega 328, and the ATtiny85. The 22pf capacitors and 16 MHz crystals in the middle drawer are only ever used for custom Arduino boards, so I keep them close to the Arduino ATmega 328 chips.

All kinds of cool stuff here. Always have a drawer labelled "unsorted" in your workspace. There will always be times when you are too tired to bother putting stuff away properly. Keep the disorganization neat by dropping the random components in the unsorted drawer. Zip ties are a must for tons of electronic and mechanical projects. Modular, adjustable, sturdy, and non-conductive, zip ties are perfect for mad science.

I try to keep this drawer of LEDs full at all times. You never know when you will need to make a giant pixel display. Small solar cells are good to keep around. The ones in the drawer below came from tiny garden lights.

The majority of the drawers house resistors and capacitors. These are like the bread and butter of electronics. I keep as many different values as I can fit in the drawers. Nothing is worse than not being able to complete a project because you are missing a single component.

To the left of the 64 drawer shelf is the smaller drawer housing. I keep physically useful materials like Velcro, epoxy, tape, super glue, staples, and twist ties here. I also keep all screwdrivers and drill bits here. If you misplace the wrong drill bit, your whole fancy set can be reduced to useless steel rods. Make sure you have a set of Torx screwdrivers. Pesky companies like to use irregular screws like Torx to prevent you from getting inside their electronic gadgets.

Above the smaller shelves are the sensors and power related components. I used these convenient little self-contained boxes so I can take each drawer fully off the shelves when I need it.

I consider buttons and switches sensors, so they go on this shelf as well.

Above the sensors I keep my Arduino and perfduino microcontrollers. These cases are filled with soft foam perfect for protecting circuit boards. On the far right are my notebooks for saving project ideas and sketching designs. My notebooks are a lifesaver when my computer's out of commission. In the center below is the label maker. If you are going to organize a whole lab, the label maker will save you a few hours writing everything out neatly and cutting tiny strips of sticker labels.

The perfduino I made is on the left. On the right is my Arduino Duemilanove board.

Finally in an attempt to cram yet more materials and tools, I set up this hanging shoe rack behind my chair.

The bottom shelf contains power supplies and my electric stove top for chemistry experiments. Above them are all my toy guns including glue and Nerf.
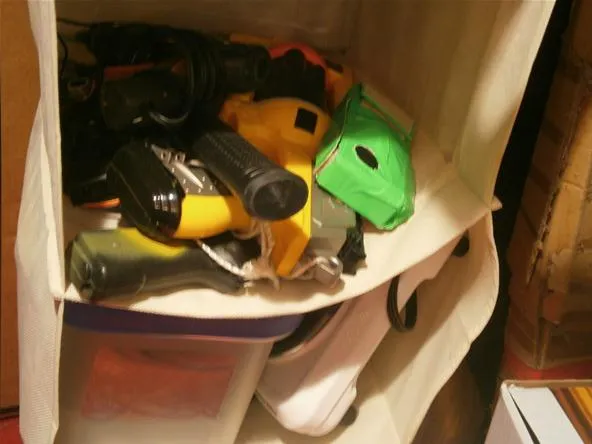
Above the guns is the all important hacksaw! These are great for metals and plastics. With the hacksaw is a box of RC supplies for a current project, a monkey wrench in case of sudden urges for Luddism, and conductive thread.

My headphones and blowtorch are next. Sometimes you need to drown out the washing machine. Sometimes you need to shoot searing columns of blue fire to release some stress.

Plastic tubes! Invaluable for chemistry projects, distillation, hydroponics, and etching PCBs. I collect lots of valves and connectors, as well.

I keep my solid core wire suspended above me on a rope! It's really easy to spool the wire off when I need it and it never gets in the way.

Enameled and stranded wire are mounted on a threaded rod in the bookcase next to the workbench. On the next shelf up, you can see some silicone sealant and the automated watering system box in storage.

The bookcase is where I keep all my household chemicals and glass jars. Be sure never store reactive chemicals on the same shelf and always make sure bottles are sealed tight. In the case of the ferric chloride acid, I keep the closed plastic bottle in a sealed plastic bag just in case.

My double boiler is great for experiments that require gradual heating. When making homemade rocket fuel, the straight stove top is dangerously hot. A double boiler will give you a safe, slow, and steady rise in temperature.

Label all your chemicals! So many chemicals are white or clear that there is no way you could possibly tell them apart by their appearance. As soon as you store something, label it!

Coffee filters and funnels are important for filtering solutions you create. I use the alcohol for a tiny tin stove and to clean my instruments.

My favorite new addition to the Mad Science Lab is the digital USB microscope. It makes circuit board inspection and photography a breeze.

I was given this microscope for free because the lights were broken. I zip-tied on a battery pack soldered to an LED and voilà, let there be photons.

I just have the overhead light turned on in the picture below, but there is a light underneath the stage for illuminating liquids and slides.

The very latest addition to the lab is the PCB etching tank. I am still improving the design adding safety features and automatic etchant transfer. Stay tuned for the improved version soon!

Below is the most bad ass project I am working on. The Barbie jeep in the photo will soon be a mobile remote controlled rocket platform! Further information is classified, but it will stay pink no matter how deadly it ends up being.

Software
- Writing
Lucky for us, WonderHowTo has a great user interface that makes it easy to create steps, import media, and format your text. When I can't get online, I use OpenOffice to write all my documents. It lets you save and access almost any text document file including open source files.

- Video Editing
I use OpenShot to edit the Mad Science videos. It's free and works reasonably well. It's the best video editor I have been able to find for my Ubuntu Linux operating system. I love Final Cut, but I don't have the money or hardware to use it. I would be interested to hear if any of you mad scientists have video editor suggestions!

- Circuits
I use Fritzing to design my circuits. It simple to start and robust enough to hand a lot of hobby projects. I love the user interface and the easy on the eyes graphics. If I spend too long staring at an Eagle design, I start getting cross-eyed.

- Programming
I am admittedly not a programmer, but when I do program it's with the Arduino microcontroller board. It is prefect for physical interaction like robots, home automation, booby traps, etc. The best part about using Arduino is that the Arduino website is full of active and helpful community members. Arduino forums will help you out of a bind nine times out of ten. I have also started to use Processing for desktop displays of Arduino inputs.

- Image Editing
I use the GIMP image editor to create custom images for the articles. It works fine for most graphics projects, but it is not as powerful as Photoshop. Again, I am limited by my operating system, but the tools I have are enough to keep Mad Science stylish.

Software logos by penguenyazilim, OpenShot, makesomecode, varesano, baytechschool
Workflow
The workflow for any given day is determined entirely by the experiment or project I attempt. Some chemicals take a long time to react, some circuits are buggy, and some projects just never work. I complete each project or experiment before I write to be sure I don't waste time. Once I know it works, I do it over again taking pictures and video. A good portion of time goes into deleting and editing the pictures after the fact. If you are doing it right, you should be taking at least three of each picture you attempt. Often times I end up taking 8 pictures of the same shot to make sure I have it right.
After all of the pictures are ready, I upload them with the WonderHowTo article creator and let my brain spill out between the cracks of the photos, cementing them into a delicious and coherent tutorial. Finally, my editor reviews, corrects, and publishes the article so it can appear on the Mad Science Blog!
And that is it! All the madness demystified. I hope you enjoyed this look at my workspace and that it will help you in setting up your own lab.
What is your workshop like? What are your favorite image, video, and schematic programs? Let us know in the comments below. I'm sure there are excellent programs out there most of us don't know about. As always, feel free to start a thread in the forum or message me if you have any questions or suggestions concerning the Mad Science Lab.
Don't forget about our ongoing photo contest. A picture of your workspace would make a great entry for a chance to win your own lucid dreaming goggles kit. Just post a photo to the corkboard like I did here.


Comments
Be the first, drop a comment!